


Raising Chickens is a great way to get your feet wet in self-sufficiency. They are fairly easy to raise and your reward is Fresh Eggs!
The first thing you want to look into before you purchase your chicks is if your able to have backyard chickens. Whether you are in town, suburb, or rural area they all have their own “Rules”. Be sure you are complying by them if you don’t your chickens may be taken away or you will have to find new homes for them!
Next, be sure you have a permanent home for them once they have outgrown the brooder (a warm safe place for them while they are chicks). Which will be after about 6-8 weeks depending on the weather outside.
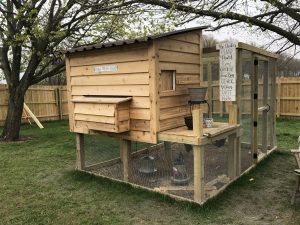
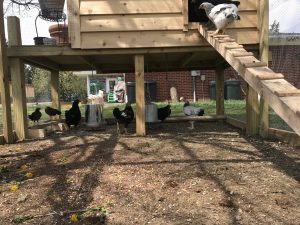
Lastly, you will want to consider how many chickens you want or have space for. The minimum rule of thumb is about 2 to 3 square feet per chicken inside the chicken coop, and 8 to 10 square feet per chicken in the outside run. You also should have a minimum of 3 chickens. They are companion birds so they do not like to be alone. We bought 10 chickens. The inside our coop is 4 feet by 6 feet, and our outside run is 8 feet by 12 feet. Just to give you an idea in the pictures above.
Now that you have these items checked off your list, you are ready to begin raising chicks.
Your local farm store is a great place to start in the Spring they usually have “Chick days” which means THE CHICKS ARE IN!
 Before you go and pick up your furry friends you will want to make sure you have a container of some sort ready for them once you get home. Choose a place in your home, basement, garage, mudroom, etc that is draft-free, quiet, away from family pets, and children.
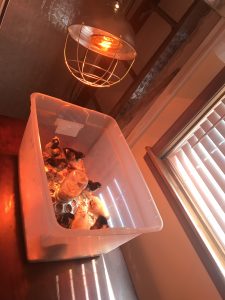
We started with a small tote in our spare bathroom, and then after about a week moved up to a horse trough (that we borrowed from a friend) But a very large box would work, or any other large item with an open-top, you can get creative!
Then when you are at the farm store you can gather the following items to bring home with you and your chicks.
- Pine Shavings
- Heat lamp w/ bulbs
- Chick starter feed
- Chick sized grit
- Water (we used a full size one, so we didn’t have to purchase 2 different sizes, but consider the container they will be in before they move out to the coop, be sure they will have enough room)
- Chick size feeder (We did purchase a small feeder, this way we cut down on feed waste because they will scratch at the feed if the feeder is too big)
- A Chicken book – I found this SO useful to have when I had little questions, get a good book that walks you through everything about raising backyard chickens.
- Thermometer – I found it helpful to have in the brooder, so I knew what the temp was on the chicks’ level.
- CHICKS!! It’s a good idea to ask about how old the chicks are. This way you know about what temperature they should be at, and when they can move to their outdoor coop!
Time to take your chicks HOME!!!
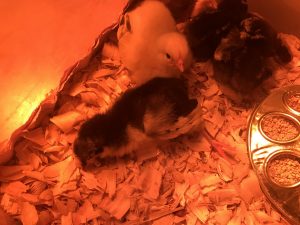
Once you arrive home with your chicks you want to work fast to get the brooder finished 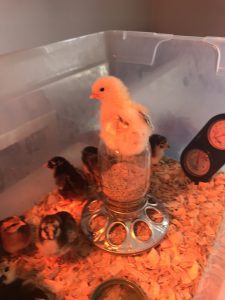 being set up while you keep them as warm as possible. You want to set up your heat lamp, put a good layer of pine shavings into the bottom of your tote, put the water and feeder in, filled, and ready to go.
Tip: you might find that the chicks kick pine shavings into the waterer and feeder. A good way to solve this issue is by putting the waterer and feeder up a little higher, we put them on scrap pieces of wood, but landscaping bricks work too. We put just enough to prevent the chicks from being able to kick shavings in. It will save you a tone of headache!
Now your ready to take your chicks out 1 at a time, Check their butts for something called “pasty butt” (Please research this more so you know what you are looking for and what to do! There are a lot of great videos on this. If it is not solved right away your chicks could die) and then dip their beaks into the water dish so they know where they drink from.
Now that you have all your chicks in the brooder keep a close eye on them for the first few hours, be sure the heat lamp is keeping them warm enough.
 You can tell this by if they are huddled under it – They are too cold or if they are trying as hard as possible to get away from the heat – They are too hot. Here is an idea of what temperature to go with for weeks of age. 1st week 95 degrees, 2nd week 90 degrees, 3rd week 85 degrees, and so on decrease by 5 degrees each week.
Please ensure your chicks have fresh water and food and your well on your way to fresh eggs! Once your chicks move to their outside coop (at about 6 – 8 weeks, when the night time temp is above 50 degrees, or your chicks are fully feathered) things get easier. A new chick is like a new baby, fragile, and growing by leaps and bounds.
Health and Happiness
SV
* My Chickens have become great companions, It’s true I’ve become a chicken lady!
Wingin’ it.
