


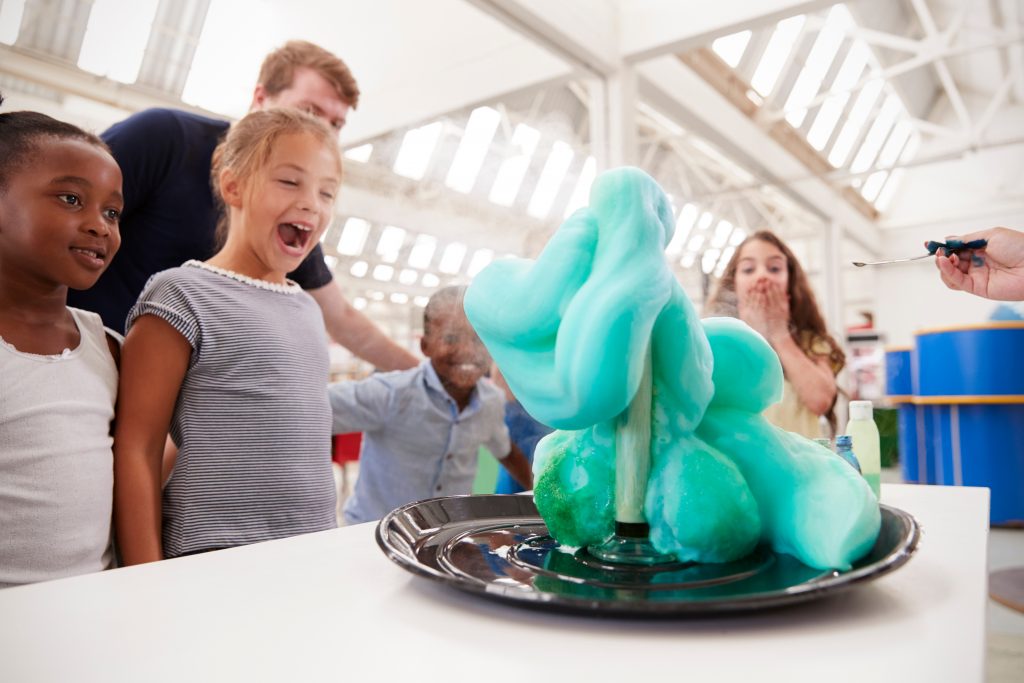
As a science teacher, I have often found the most effective experiments and demonstrations are the simplest ones. Just because you find yourself at home, doesn’t mean you can’t conduct high-quality STEM (science, technology, engineering, & mathematics) experiments using common household items. Don’t worry if science wasn’t your subject in school – I’ve curated a list of some of my favorites for all ages, as well as a little bit about the science behind them. Enjoy & stay curious!
Experiment 1: Oobleck
Materials needed:
- Water
- (Clear) cup
- Spoon
- Cornstarch
Procedure:
Observe the behavior of water by itself. Pour some in a (preferably clear) cup. Stir and press on the water slowly with a spoon. What happens? Next, stir and press on it quickly. What happens now? Add a few scoops of cornstarch to the water and mix thoroughly. Repeat your tests – stir it slowly, then quickly. Let your budding scientists experiment with different ratios of cornstarch to water.
Does adding more or less cornstarch change the observations? What is the “best” ratio for effect? Are there other substances that can be mixed with the water to produce similar effects?
Try sugar, glue, flour – whatever you have on hand!
The Science Behind:
When mixed in the proper proportions, the mixture behaves like a solid under certain conditions (like when you try to stir it quickly or press on it fast) and a liquid under other conditions. This is known as a non-Newtonian fluid because it doesn’t follow the ordinary laws of viscosity. That is, it doesn’t have a uniform consistency under various stress conditions. Want to know what else is a non-Newtonian fluid? Ketchup! Remember how hard it was to shake it out of glass bottles? Devise the best ketchup-removal procedure (fast shake? Slow pour?) based on your newly gained knowledge of non-Newtonian fluids. If you’re feeling really crazy, you can fill a baby pool with water and add cornstarch to see if you can “walk on water”! (If you can’t do this at home – look it up on YouTube. Very entertaining!)
Experiment 2: Surface Tension
Materials needed:
- Cups
- Water
- Pepper
- Sewing needle
- Plastic fork
- Toothpick
- Dish soap
Procedure:
Fill a cup of water up to the brim.
- Challenge 1 – get the sewing needle to balance horizontally on the surface of the water. You may use the fork to help, or just use your hands. It’s up to you! Why does this “work”? Can you get other objects to balance?
- Challenge 2 – shake a thin layer of pepper over the surface of the water. Next, use the toothpick to apply a drop of dish soap to the center of the water. What happens? Why?
The Science Behind:
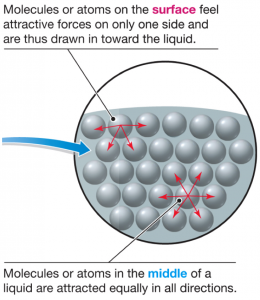
Water molecules stick to each other, kind of like glue (due to intermolecular forces of attraction). When molecules stick to molecules of the same substance, like water sticking to other water molecules, it is called cohesion. They do this because water is polar – one end of the molecule is a little positively charged, while the other end is a little negatively charged. The positive part of one molecule attracts the negative end of a neighboring particle, like magnets – very strongly. This is a special kind of attraction, called a hydrogen bond. As a result, it creates a very strong surface tension that allows things like needles, pepper flakes, or water bugs to balance on top. Adding the dish soap interferes with the attraction of the water molecules, weakening surface tension.
Experiment 3: Homemade Ice Cream
Materials Needed:
- 1/2 pint heavy whipping cream
- 1-1/2 cups white sugar
- 4 teaspoons vanilla
- Gallon sized freezer Ziploc baggies or old coffee can
- Quart sized freezer Ziploc baggies
- Rock salt
- Ice cubes
- Towels
Procedure:
Mix the half and half, whipping cream, sugar, and vanilla together. You may have to heat the mixture to get the sugar to fully dissolve, then cool. Pour one cup of the cooled mixture into a quart-sized freezer Ziploc and seal carefully, ensuring to release as much air from the bag as possible without spilling the mixture. Next, place that quart size bag into a gallon-sized bag or coffee can. To the gallon Ziploc or coffee can, add ice cubes (about 2-3 cups) and a few scoops of rock salt. You can play around with the ratios by adding more or less salt. Shake or knead the bag for several minutes, wearing gloves or using kitchen towels to protect your hands from the cold.
At this stage, your ice cream will have the consistency of soft-serve but you can put the mixture in the freezer to firm the texture up even more – if you can wait that long! Top with your favorite toppings like chocolate sauce, crushed nuts, or sprinkles and enjoy.
The Science Behind:
When the rock salt is added to the water, it lowers the temperature at which the ice freezes, creating a super cold solution that allows the cream to solidify. This is known as freezing point depression, and it is a colligative property of the solution. A colligative property is one that depends solely on the concentration of the salt (solute), but not what kind of salt (solute) it is. So, if you added more rock salt to the mixture, the freezing point would be lowered even more. Does the opposite hold true? If you added salt to water, would it boil at a higher temperature (boiling point elevation)? Try it out with some pasta for dinner tonight!
- Shallow baking dish, plate, or bowl
- Liquid food coloring
- Q tip or toothpick
- Liquid dish soap
Procedure:
Pour a thin layer of milk in your vessel (baking dish, plate or bowl) and add drops of food coloring anywhere you’d like. What do you observe? Now, dip the Q-tip or toothpick into the dish soap and dunk it in the milk (anywhere) for a few seconds. Now, what do you observe? You can repeat this procedure, moving the q-tip to a different spot each time.
The Science Behind:
Dish soap is a cool molecule! It essentially has one end that attracts fats (like dirt and, in this case, fat in the milk) and one end that attracts water. When the soap is added to the milk, it runs around trying to “catch” all the fat dissolved in the milk, causing the cool swirling effect you see. Repeat the experiment with different types of milk – do you get the same results with skim milk as you do whole milk?
Experiment #5: A Twist on the Volcano
Materials Needed:
- Baking soda (sodium bicarbonate)
- Vinegar (acetic acid)
- Bottle or jar with a narrow opening
- Balloon (that will fit over the opening)
Procedure:
Place a small amount of baking soda in the bottom of the bottle or jar. Next, pour a small amount of the vinegar into a deflated balloon, careful not to spill it. Very carefully stretch the balloon over the opening of the jar/bottle without spilling the vinegar in the process. Once the balloon is securely covering the bottle/jar opening, dump the vinegar into the baking soda and watch what happens! Play around with various amounts of baking soda and vinegar to see who can blow up the balloon the most!
If you have any flip-top bottles (like pill bottles that don’t have the screw-on caps), you can create a rocket! Simply put different amounts of baking soda and vinegar in the bottle, quickly but loosely close the cap, and place the bottle cap side down on the floor (outside is safest). If there is enough pressure, it will cause the bottle to blast off from the cap!
The Science Behind:
There is more than meets the eye to this seemingly simple reaction. First, the acid in the vinegar reacts with the base of the baking soda and creates a new molecule, called carbonic acid. Once this forms, it starts decomposing (breaking down) to form carbon dioxide (a gas, the bubbles!) and water. The carbon dioxide is what gets trapped in the balloon or inside the bottle.
There are SO MANY options for STEM experiments at home, but hopefully, these will get you started. You don’t need fancy equipment or a laboratory of glassware; just start with a question and see where that leads you.
Post your results to Toledo Moms!


 experiments using common household items.)